Read the transcript to the above video:
In the previous movie, we saw in our experiment, that the area in which objects are sharp can be bigger or smaller.
The bigger the aperture (or the hole in our lens), the smaller the area of focus. And the smaller the aperture, the bigger the area of focus. That´s a bit confusing.
BUUUUUUUT: we are lucky! Remember the aperture numbers you have set in our last movie? Small numbers result in small depth and large numbers result in large depth, isn´t the world easy? That´s all you need to remember!
By the way: aperture number sounds pretty stupid. Photographers call that f-stop.
Now I´m gonna show you a few situations where you can apply your new knowledge. Here are a few examples that help you choose the best aperture setting.
First example: landscape photography
You have a palm tree in front of your image and the sea in the back. You want foreground and background to be perfectly sharp. Do you need a small, or a big depth of field?
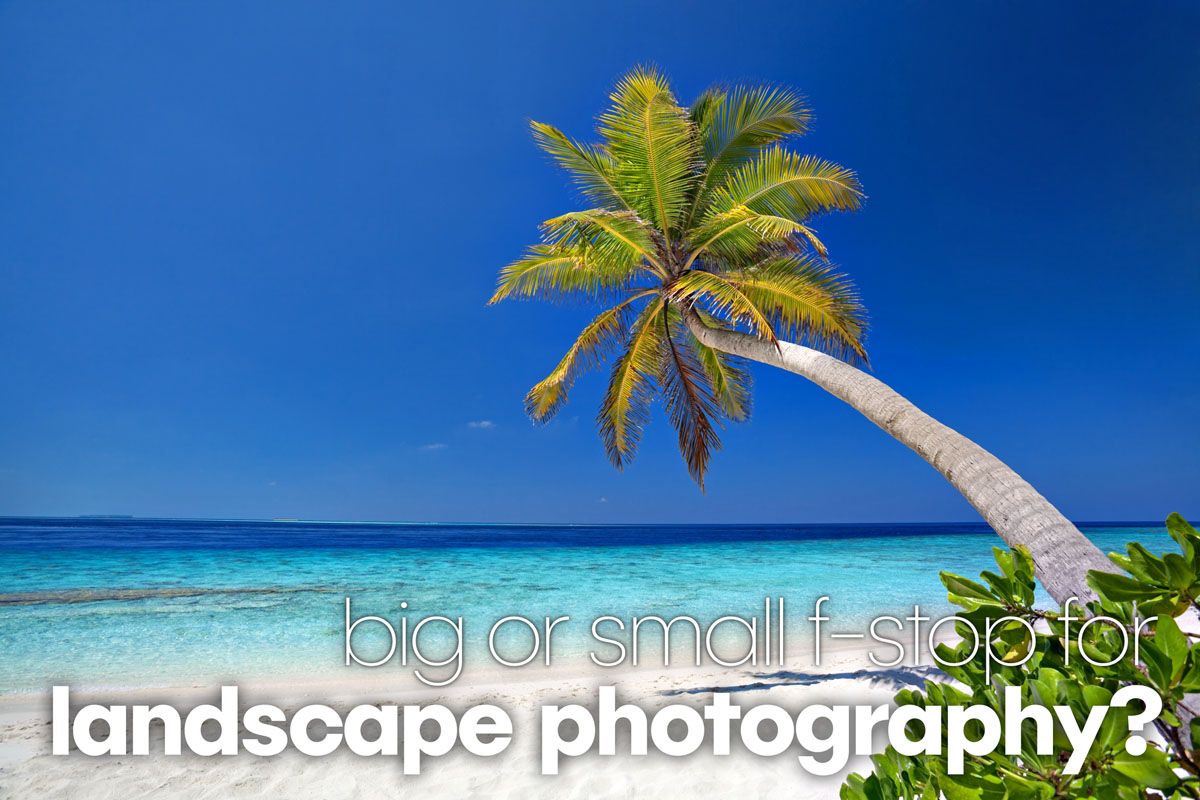
A big one - and with it a big f-stop – remember big depth of focus, big f-stop.
Generally, you´d go for something around f11, it doesn´t have to be too extreme.
Second example: architecture photography
You are shooting up on a building. You want the windows in front to be sharp, and of course, you want the top of the building to be sharp too.
Remember our Experiment from the last movie. What would you choose?
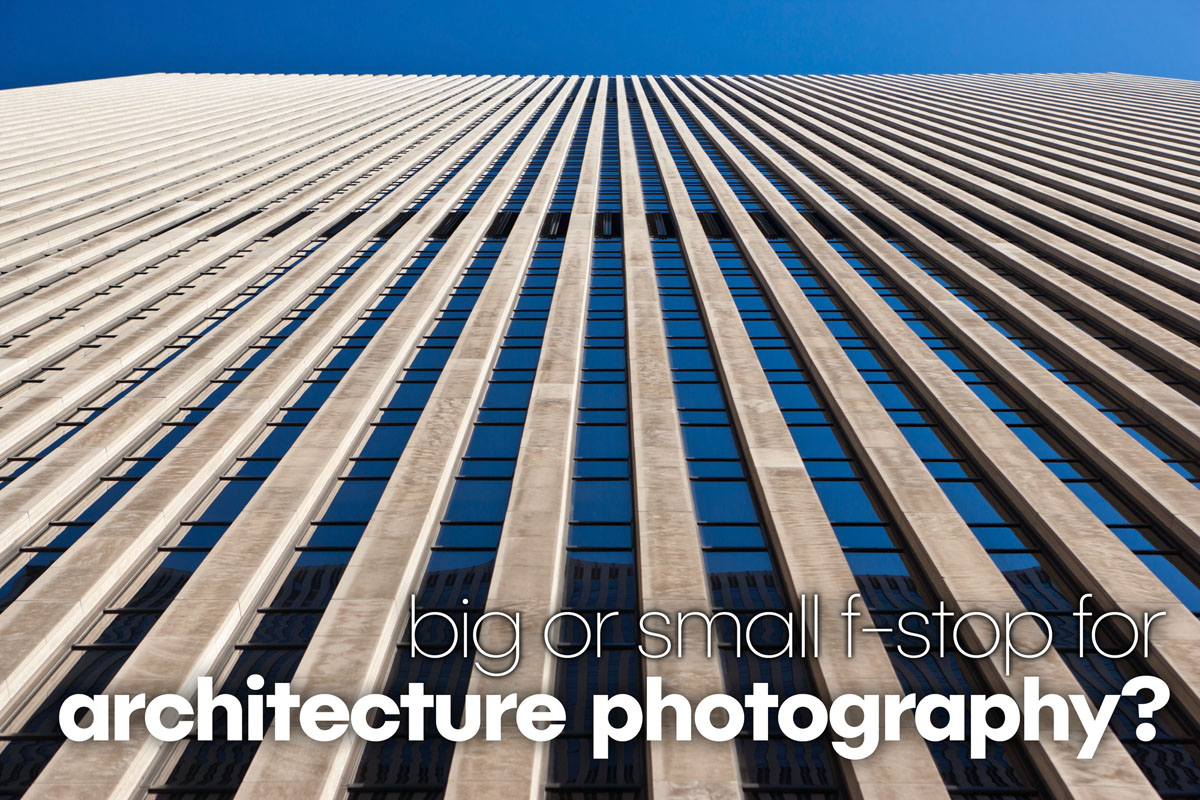
A big f-stop. Again, f11 is a very good setting for wide angle shots like this.
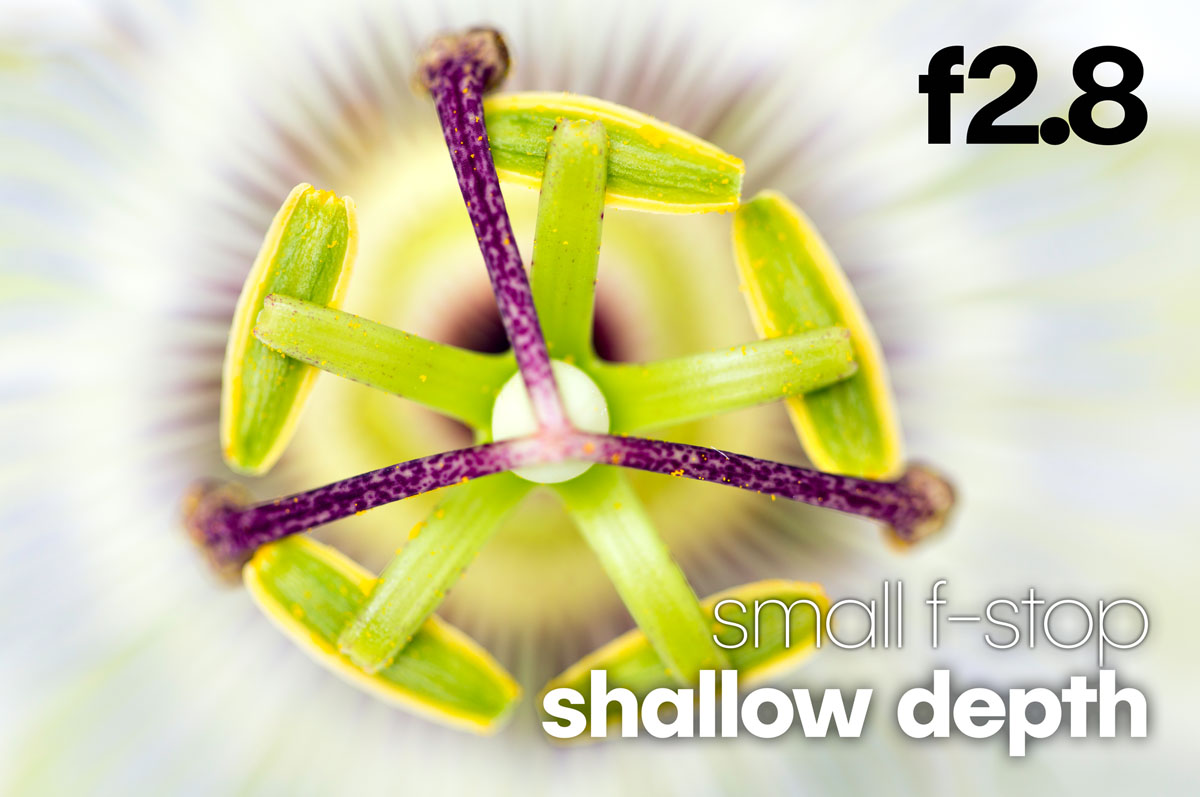
Third example: macro photography
That´s a difficult one: you get very close to a flower. Trying to capture the flower, you find out that the closer you get to an object, the more shallow the depth will get.
And while the pollen is well focussed, the petals are hardly recognizable. What are you going to do?
The truth is: that depends. How do you want the image to look like? Some prefer a very shallow depth – they do what?
They choose a small f-stop and get – this image:
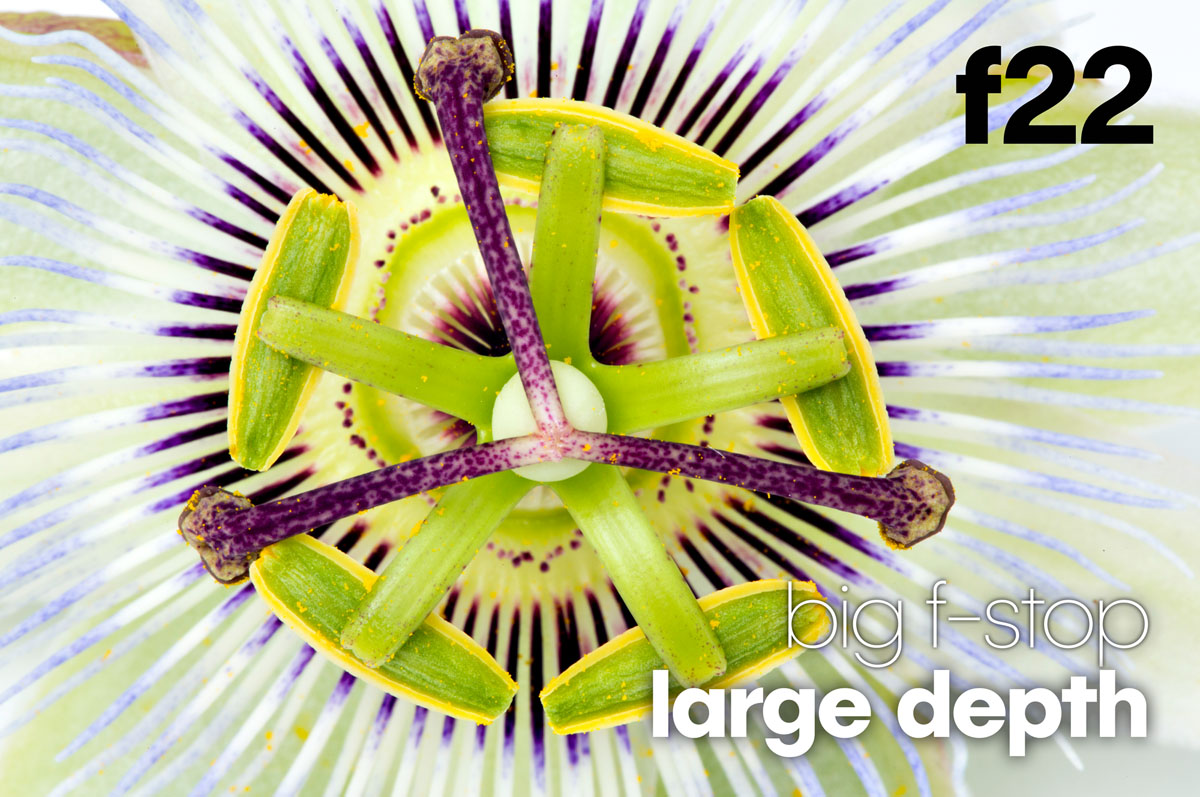
Others like to have as much in focus as possible. What will they do?
Choose a big f-stop and get – this image:
So it depends a little on what look you prefer.
That´s a good opportunity to recap, by repeatedly looking at the above images:
Small F-Stop, small area of focus. Big F-Stop, big area of focus.
Soooooo easy! Repetition helps you understand – which is quite natural, make sure to watch the one or the other movie twice. Repeating content is key to remembering and understanding.
And the other key is practice. So go out and shoot a few landscapes, houses and flowers. It doesn´t have to be a beach or skyscrapers in New York, a tree is just as good
Practice a bit outdoor or even indoor and compare different f-stops for the same scene. But try to stay in bright, well-lit areas for now.
QUESTIONS? Please don´t hesitate to post in the comments on youtube
NEXT LESSON: 2.3. The Effects of Aperture - Part II